User Guide
Introduction
This document serves as a comprehensive guide for installing and configuring the Shift / Tuffnells AutoPrint Application. Below, you will find step-by-step instructions to ensure a smooth setup and optimal functionality.
Prerequisites
Before initiating the installation, please ensure the following prerequisites are met:
Download the Installer: Download the AutoPrint Application installer from here.
Zebra Printer Installation:
- Ensure your Zebra Printer is connected locally via USB.
- If your printer is networked, please contact Tuffnells IT Support for assistance.
Printer Sharing:
- For Windows 10 & 11:
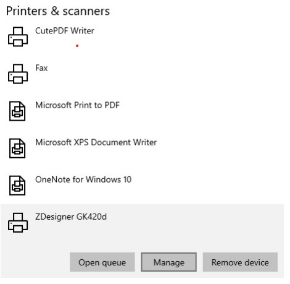
- Search for "Printers & Scanners" using the start button.
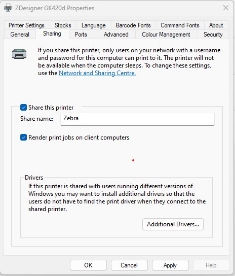
- Select your printer, click 'Manage', and then 'Printer properties'.
- Go to the 'Sharing' tab, check "Share this printer", assign the share name "Zebra", and click 'Apply'.
- For Windows 10 & 11:
Network Requirements:
- Ensure the PC has internet access to https://app.tuffnells.co.uk and SFTP (Port 22) access to sftp.tpeweb.co.uk.
- SFTP credentials if using SFTP Upload functionality.
- Details of the path where files will be uploaded from (e.g., \server\carriers\tuffnells). Ensure this folder is empty before installation and does not contain subfolders.
Installing the AutoPrint Application
AutoPrint Function Only
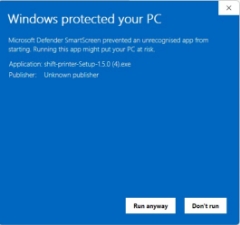
Locate the downloaded installer and execute it.
- You may see a security prompt like the one below. Click "More" then "Run anyway".
Follow the on-screen instructions to complete the installation. Once installed, the application will launch.
On the configuration screen, enter the Printer share name you set earlier and click 'Start'.
Log in with your existing Dashboard credentials. Once signed in, the application will handle the order uploads and automatically print labels.

Full Functionality
Follow the initial steps above to run the installer and access the configuration screen.
Enter the Printer share name, then click 'Advanced Settings'.
Complete the Advanced Settings with the necessary details.
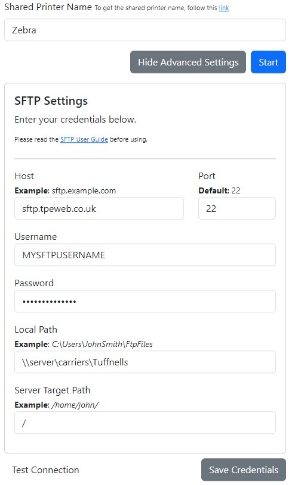
Click "Test Connection" to verify connectivity. If successful, you'll see a 'Connected' status in the top left corner.
- If an error occurs, please verify with your IT department that you can access port 22 over the internet.
Once connected, click "Save Credentials" and then "Start".
Log in with your Dashboard credentials. The application will remain operational and continue to automatically print labels as orders are uploaded.
For additional assistance or troubleshooting, please refer to our support page or contact our service desk.